Comparison tables display a table of posts, pages and/or custom post types in a table format where you compare their data e.g. site, user ratings, user votes, good and bad points, summaries etc.
Default Comparison Table Templates
Instead of creating your own comparison tables you can use the predefined comparison tables as follows:
WPBakery Page Builder
Step 1: Create or edit a post, page or custom post type.
Step 2:Click the Backend Editor button (if you don’t see this click here) and then the Add Template button.
Step 3: Click the Default Templates tab and click on one of the comparison table templates to insert into the page editor.
Elementor
Step 1: Create or edit a post, page or custom post type.
Step 2: Click the Edit with Elementor button (if you don’t see this click here).
Step 3: Click the Add Template folder button to open the Library window.
Step 4: Click the My Templates tab and then click Insert for one of the comparison table templates to insert into the page editor.
Creating Comparison Table
If you want to create your own comparison table do the following:
WPBakery Page Builder
Step 1: Create or edit a post, page or custom post type.
Step 2: Click the Backend Editor button (if you don’t see this click here) and then the Add Template button.
Step 3: Click the Comparison Table element. The Comparison Table Settings window will open where you can control its appearance.
Step 4: You can choose what posts, pages or custom post types to display based on the Post Types, Post/Page IDs, Categories and Tags options.
Step 5: You can choose what fields are shown in the comparison table by adding or removing fields from the Fields option.
Step 6: You also have the ability to control the order of the table and whether users can change this order from the Order and User Sorting options respectively.
Step 7: There are also tabs to control the appearance of the ratings, buttons, good/bad points and labels in your table.
Elementor
Step 1: Create or edit a post, page or custom post type.
Step 2: Click the Edit with Elementor button (if you don’t see this click here) and then the Add Template folder button to open the Library window.
Step 4: On the left drag the Comparison Table element over to the page. The comparison table options will now show on the left where you can control its appearance.
Step 4: You can choose what posts, pages or custom post types to display based on the Post Types, Post/Page IDs, Categories and Tags options.
Step 5: You can choose what fields are shown in the comparison table by adding or removing fields from the Fields option.
Step 6: You also have the ability to control the order of the table and whether users can change this order from the Order and User Sorting options respectively.
Step 7: There are also tabs to control the appearance of the ratings, buttons, good/bad points and labels in your table.
Creating Custom Field Columns/Rows
If you want to show custom field values in your table do the following:
Step 1: Edit the Comparison Table element using WPBakery Page Builder or Elementor and go to the Fields option.
Step 2: Add CUSTOM_FIELD:field_name:Field Title where “field_name” is the name of the custom field you want to display and “Field Title” is the name of the column/row in the table.
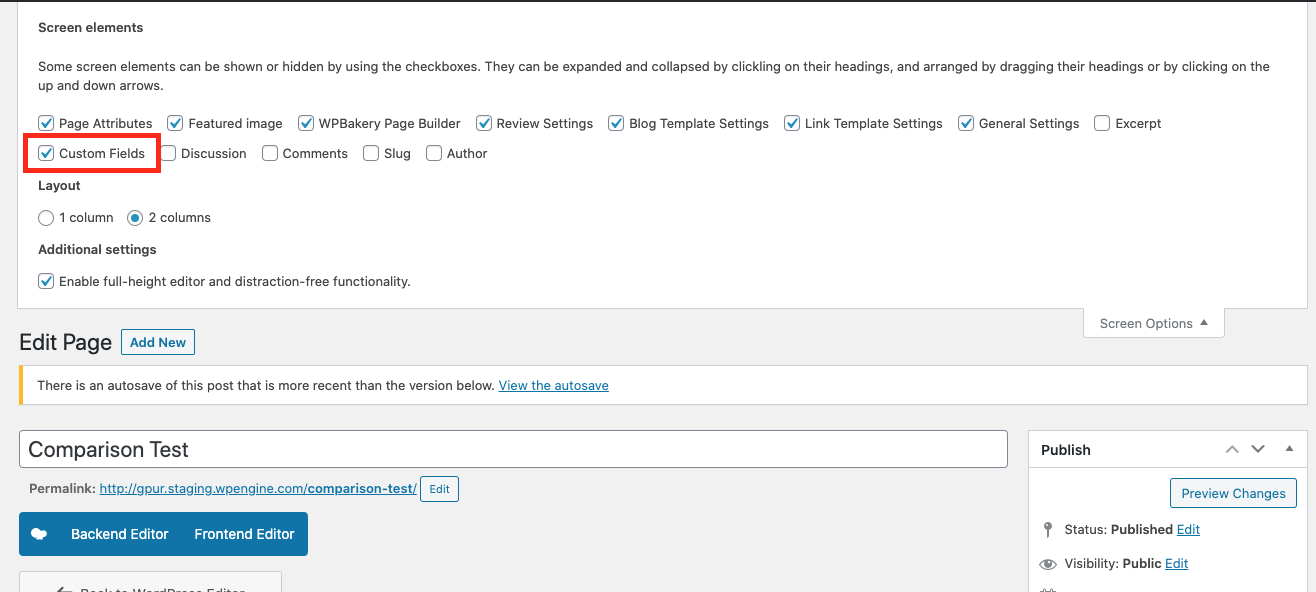
Step 3: To add a custom field to a post so this data is display in the table, create or edit a post and click the Screen Options button in the top right corner of the page and check the Custom Field checkbox.

Step 4: Scroll down to the Custom Fields box and create a new custom field or use an existing one if you wish.
Step 5: Give the custom field a name, in this case “field_name” which is what we used in the Comparison Table, and give it a value which is what is displayed for this post in the table.

Or to add a link as a value do the following:

Step 6: Add your custom field to the post by clicking the Add Custom Field button and then save your post.
Step 7: Go back to your comparison table and refresh the page – should now see a new column/row called “Field Title” and the post you edited should show the value for the custom field you created.
